Selenium. What and Why.
Selenium is an open source project which encompasses a variety of tools and libraries designed with the purpose of providing browser automation, oriented at performing automated tests for web applications.
Within this range of products there’s a very important one, called Selenium WebDriver.
WebDriver is, on one side, an API in which a user can write scripted instructions for a web browser to perform certain actions like a real user would –with a certain set of capabilities defined in common and for each browser separately, and on the other, the very driver software which runs the web browser and will handle the communication between itself and Selenium. It essentially consists in an instantiation/implementation of a web browser –any popular one (Firefox, Chrome, Safari, etc.)– that the driver controls via the user scripted commands, which give instructions for several actions –like starting a certain web browser instance, getting URLs, attributes, etc., or finding elements in a web document through a specific set of parameters, and can be written in most popular programming languages like Java, Python, JS, Ruby or C# –provided language binding libraries are installed.
WebDriver is often chosen for its simplicity –especially its setup, compactness and effectiveness at driving web browsers, and also good support; Selenium provides its own-maintained drivers when thor party ones are unavailable. It doesn’t require the API to be compiled with the source code; in this way, the API works in an unintrusive way, isolating the testware from the tested application. WebDriver can also be run remotely through a server (Selenium Server), developed and maintained by the project. The combination of all these features provides for an easy browser backend use which makes the framework suitable for cross-browser/platform automation.
As of June 2018, WebDriver became a W3C standard.
Selenium, WebDriver and UI Tests. What and How.
To get started we will need to set up a couple certain things. To write and run the test scripts will require an IDE to be installed in our operating system, then we can proceed to install the language binding libraries for the programming language we choose to use, as well as the drivers for the browser which we may want to implement.
In order to create and run our tests, we will need to use locators to find the elements of a web document –that is, the elements of our web app UI. When WebDriver initiates and loads a page, we can then specify the locators –DOM elements– to be found, using a certain set of parameters.
There are eight ways (location strategies) for locating DOM elements/nodes:
- By ID: used to specify the unique identifier of an HTML element.
- By Name: specifies the name of an element.
- By ClassName: Specifies one or more classnames for an element (refers to a class in a style sheet).
- By TagName: returns the tag name of the element.
- By Link Text: only matches exact link text content.
- By Partial Link Text: matches partial link text content.
- By CSS Selector: combines an element selector and a selector value that can identify particular elements on a web page. It can be used to locate web elements without ID, class, or Name.
- By XPath: a technique in Selenium to navigate through the HTML structure of a page. It uses “path like” syntax to identify and navigate nodes in an XML document.
We’ll usually start by creating the instance of the web browser with which we want to execute the test –provided we imported the necessary packages, which is usually done automatically in most modern IDEs as long as they’re properly installed; in this case, Firefox browser:
import org.openqa.selenium.WebDriver;

import org.openqa.selenium.firefox.FirefoxDriver;

WebDriver driver = new FirefoxDriver();
(WebDriver is an interface that enables introspection and control of user agents (browsers). It has three methods: control of the web browser, selection of elements (WebElements), and debugging aids.)
Only after that we can instruct the driver to browse an URL, using the get method:
driver.get("https://app.autify.com/auth/signin");Once the browser is initiated we can proceed to locate the elements of our UI using the findElement method.
The basic syntax would be:
WebElement [elementName] = driver.findElement(By.[LocationStrategy]("[LocatorValue]"));
In a short description: 1) We declare a new element through the WebElement interface 2) We instruct the driver to use the findElement method provided by WebElement interface and implement a specific strategy.
Now a practical, real example. Let’s say for example, that we want to locate an input field “username”:
import org.openqa.selenium.By;
WebElement usernameInput = driver.findElement(By.id("username"));
In this case we use the ID location strategy which will try to find a specific attribute value, but we can also locate an element by its name attribute:
WebElement usernameInput = driver.findElement(By.name("username"));In certain cases we may encounter ourselves with ambiguities, like when an attribute value –like name or id– is shared by many elements. In such case we may implement a strategy like XPath or CSS Selector, using the findElements method:
XPath:
WebElement usernameInput = WebElement usernameInput driver.findElement(By.xpath("//input[@id='username']"));
CSS Selector:
WebElement usernameInput driver.findElement(By.cssSelector("input#username"));Then the quid of Selenium testing per se. If we, for example, needed to validate the value of our input element’s attribute against any value entered by a user, we will use assertions. In Selenium, an assertion compares the expected result of an output, with its actual result.
import org.junit.Assert;
String uninp = usernameInput.getAttribute("username");
Assert.assertEquals(uninp, "username");
This is the syntax utilized for the Java programming language Junit tests. For other languages like, for example, Python, find_element_by_, assertEqual, etc., will be the equivalent.
If both (real and expected) parameters coincide, the assertion will be true and the test step will pass.
To instruct the driver to close the browser, we will use the quit method:
driver.quit();
The IDE console will finally show us a detailed report of the test run results.
And, voilà! We just ran a Selenium test.
These, among many other existing methods, attributes –and combinations of them, can help us instruct the browser driver which actions to take, through our automation scripts.
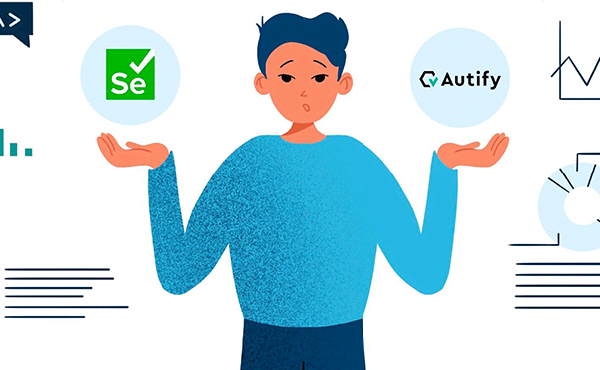
Now, what’s the deal?
This all looks like versatile, powerful and meeting the purposes. But, doesn’t it also seem like a little bit too much work? What about the competencies a tester should have? The implicit costs in training personnel, the implicit time consumption in setting up all our testware once a new project starts, just to think of a few possible scenarios.
Instead of using valuable time creating test scripts, why not use the power of Artificial Intelligence and let a no code platform learn changes in our code and adapt to them, making script writing/maintenance a thing of the past?
Autify’s can deal with that, and more, thanks its powerful features:
- A SaaS delivery model.
- A no code platform –no coding required.
- A GUI for recording test scenarios then play them back.
- Test script maintenance by AI.
- AI algorithms which learn the UI changes, adapt to them and alert the QA team.
- Cross-browser compatibility, including mobile devices.
- Visual Testing engine.
- Visual Self Healing.
- Integration with Slack, Jenkins, TestRail, etc.
- Built-in reporting –no third party tools.
- An exceptional tech customer support.
Customer support is of utmost importance for us, and so we procure to provide the most human level of attention possible, considering real human beings and real human needs.
You can see our client’s success stories here: https://autify.com/why-autify
- Autify is positioned to become the leader in Automation Testing Tools.
- We got 10M in Series A in Oct 2021, and are growing super fast.
We have different pricing options available in our plans: https://autify.com/pricing
- Small (Free Trial). Offers 400~ test runs per month, 30 days of monthly test runs on 1 workspace.
- Advance. Offers 1000~ test runs per month, 90~ days of monthly test runs on 1~ workspace.
- Enterprise. Offers Custom test runs per month, custom days of monthly test runs and 2~ workspaces.
All plans invariably offer unlimited testing of apps and number of users.
We sincerely encourage you to request for our Free Trial and our Demo for both Web and Mobile products.